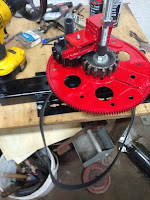
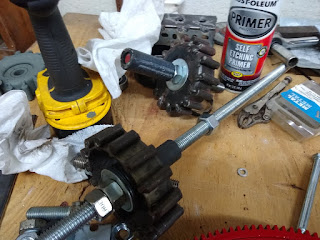
Page 25, Project Goal Added, To-Do List Updated

I have a very important goal added to the design phase of PIE 2.0. It is something that crossed my mind in the beginning but was not something that was as important as simply getting the drive to work. Now it seems more important than ever to stay with the true spirit of a “Grassroots Mechanic Movement”!

Simply put, the PIE needs to be an engine that can be built by mechanics everywhere with average shop tools & equipment with a minimum budget. No needing a lathe, milling machine, shaper, dividing head, or other tools which are common in machine shops but not in the average mechanic’s workshop or garage.

I do have most of these available to me but as I was getting ready to buy material and set up machinery to make parts, I asked myself “how many mechanics have this option available to them?”, and the answer was “damn few, that’s how many”.

The common hand tools along with a welder, grinder, and chop saw are all the equipment required so far and it is my goal to keep it as simple and inexpensive as possible. It would be great to use machine shop equipment and expensive off-the-shelf components, but I think that these things are unnecessary to build a working unit (PIE, Thorson Drive, or any other)!

The updated “To Do” list (for PIE 1.0):

1- A better locking mechanism for the sun gears to the axles.

2- A way to vary the sun gear timing by adjusting axle position.

3- A different drive system from the motor to the plates, maybe a double-sided timing belt or a roller chain drive.

4- Explore the possibility of having sun & planet gears on both sides of the plates.

5- Mount in a motor vehicle for road testing.

6- Collect “Empirical” data from real world testing

7- Make sure PIE can be built/fabricated without the absolute need for machine shop tooling

8- Keep material total for one completed PIE under $200

9- Complete testing of PIE 1.0 & start building PIE 2.0  

10- Start To-Do list for PIE 2.0

Page 24, On-Road Testing Now Underway

I am performing the on-road testing phase now. I will say that I am impressed so far, even without completing a recorded data set. It is truly amazing to feel the vehicle being pushed along using so very little power, while also decreasing the amount of throttle given to the engine because of the engine load decrease.

The only change I have made to the PIE is the addition of a switch and relay to control the PIE from the driver’s seat.

In the shop, I am preparing for PIE 2.0. I deliberated heavily about the planetary gear sets. I would like to replace them with machined gears which would run quieter and smoother, but I will stay with the simple fabricated gears for now. I already have parts made to fit the fabricated gears, so this will save the time and the expense of rebuilding some components.

I seriously thought of upgrading everything, bearings, plates, gears, weights, etc. but cannot justify that at the present so it will have to wait for version 3.0 or higher.  I am, however, planning on running weights on both sides of the flexplates. This should allow for heavier weights and higher RPMs which will both equal more thrust! 

Page 23, Thornson Book, Video & Patent

Because the PIE is so closely bound to the many years of dedicated work of Brandson Roy Thornson, I am providing some of the most pertinent info I have for anyone interested.

I have uploaded copies of the book “Inertial Impulse Propulsion Engine of Brandson Roy Thornson”, the “Thornson Physics” full movie-length video, and the Thornson U.S. patent. 

They are saved to a Google Drive that I only use for sharing information. 

Here are links to each of these works,. 

Please note: The video’s quality is rather poor at times. It was recovered from old VHS tape format which was degrading in storage.

Also note: The book seems a bit disjointed, or out of order. This is exactly as it was published and delivered to me. The information in its pages is priceless and needs to be preserved.

Video: https://drive.google.com/file/d/1rRlu5DZCNO3Pf6BgSCf_nFqG5ZHPJ4cD/view?usp=sharing

Book: https://drive.google.com/file/d/198m-b8vt9I4S-U9W4NFpJQR-CavgQR5D/view?usp=sharing

Patent: https://drive.google.com/file/d/1JEjGf5L85beHRo_A99GyQ8fzRSFwxJyO/view?usp=sharing

To the best of my knowledge none of these works are currently protected by an active copyright. If anyone knows differently, please leave it in a comment and if found to be true, the work will be removed immediately.

Page 22, Is This a Thornson Drive or PIE? Yes, It’s Both.

Is This a Thornson Drive or PIE? Yes, It’s Both.

 I have started getting some comments stating that the PIE “is a Thornson drive”, so the question of whether this is a Thornson Drive, or a Pulsed Inertial Engine (PIE) is answered as “yes”.

Let’s address the differences, and the similarities.

I want to state for the record that the basis of this drive (or “engine”, as Roy Thornson called it) is the planetary gear design, including the planet weight, which was originated by Brandson “Roy” Thornson. I also want to state that I have carefully studied copies of original notes, some of which are signed by Roy Thornson. I originally studied these things to relate his discoveries to an earlier project of my own but decided I should put that design on hold to pursue this project.

The most significant difference between the PIE and Roy’s drive has to do with the handling of the weight, and what Roy called inner & outer “planet traps”. That was designed to hold the weight until a specific point in the planet gear’s rotation, then release the weight for propulsion effect. He also had the weight hitting the sun gear’s axle hard enough to be a significant addition to the propulsion effect. Neither of these are the case in the PIE.

The weight does contact the sun gear’s axle. As it was stated by Roy, the weight should never cross the centerline. In the PIE it does not hit it hard enough to be considered a portion of the propulsion, so the timing of this contact (inner stop) can be considered “less important” than other timing components of operation.

There is no “outer planet trap”, as was envisioned by Roy, being used. Instead, there is a stop fastened to the planet gear. A huge portion of the propulsion effect is created using this “outer stop”. When the weight forcefully contacts the stop, the forward pulse is propagated and then as the weight is held in position by the stop, the forward pulse is completed. Without the “outer stop”, this would not work as presented here!

The final difference is simply that Roy started building a business around his inertial drive engine. 

He wanted to supply inertial drives to the world. That is an admirable goal, for sure. Part of that was to keep trade secrets, hold patents, and utilize a sales force. The result, he was turned down & then blackballed by businesses, and governments globally.

I am not doing this as a business venture. I am selling nothing. There are no secrets. I am making this an open source project to freely get this tech to the world. The result is…

A Grassroots Mechanic Movement is born.

Page 21, A Resounding Successful Test Drive!!!

May 13, 2020

The very first “real world” test drive/road test has been completed, successfully!!! This is a major milestone for the PIE. This first road test was done with no instrumentation installed in the subject vehicle, so there is no empirical data for the record. I also did not install a remote switch or camera.

The next round of testing needs to include vehicle data recording instrumentation and the ability to turn the PIE on and off remotely from the cab.

Conditions:

Ambient temp; 40 deg. F.

Subject vehicle; 2005 Chevrolet Colorado, 4WD, Crew Cab

Power Source; 12v lead acid battery

Connection; Alligator clip wires direct from motor to battery

Mounting; Fastened to a wood pallet in truck bed, pushing on front of bed, tied down with strap

Direction of Travel; Predominantly North/South with up to 3.5 miles of East/West

Terrain: Paved highways with some hills with grades up to 5% & one gravel lane-way approx. 1000’ long

Speed: City speeds/traffic 0-30 mph, Suburban 40 mph, Rural 45 to 55 mph

Total distance traveled: 13.2 miles


Observations were as follows:

Discernible pulsing/surging in the forward direction at ALL speeds (0 to 60mph)

Noise much louder when stopped but lessening with vehicle speed

Not very discernible during normal to hard acceleration

Very noticeable during “coast down”, coming to a stop and under gentle acceleration


A good analogy would be someone pushing the vehicle with one foot (like a skateboarder) from behind using just one hand on the vehicle.


The Set Up:

Vehicle mounting was kept as simple as possible, yet safety was always a very real concern.

The PIE was very simply screwed to a wooden pallet with deck screws. The pallet was modified to fit the truck bed of my subject vehicle properly.

Braces were placed at the front of the pallet so that the forward push is placed on the front of the bed (under the toolbox) and a strap was placed at the rear to keep the PIE/pallet assembly from lifting or shifting (sliding is not a big concern as the bet has a rubberized liner).

A simple 3-sided plywood box covering was made to keep debris and weather from directly affecting the PIE (good thing I did this, since we just had a freak May snowstorm) but the ends were left open for access & visibility (imagine the questions a police officer might have otherwise).


Page 20, Prepping for Road Testing

May 9, 2020, Prepping for Road Testing

Preparations are under way to be ready and able to perform the next phase of operations, which is road testing. Since this will be tested in an open-air pick-up truck bed, several issues come to mind.
First, unattended operation. Nobody will be in the back with it due to state laws prohibiting riding in the back of a truck. If timing does slip, or there is a mechanical failure there will be a significant time lag between the failure point and human intervention. (Note: Most testing facilities also prohibit open-air riders without expensive safety harnesses and specialized equipment)
Second, the weather. The PIE needs to have some protection from inclement weather and from any debris that the wind could potentially deposit in the open gear mechanics of the PIE.
Third, nosy people. This is potentially the trickiest part of the testing. At this early stage of testing, a bit of privacy would be advantageous. The public is invited to view the data, pictures & videos online. Eventually there will be public demonstrations.
Preparations:

Secure vehicle mounting, with a weather resistant cover (hood).
Remote switching control, I prefer hard wiring for reliability.
Video monitoring, it would be good to keep an eye on the PIE if possible.
Graphic monitoring of engine load, done via vehicle computer interface.
PIE timing adjustments made & verified.
Tensioner spring tightened. Additional belt support may be necessary if there is a problem.

Note:

Moving the PIE & all its fixings back and forth numerous times, I can say that it most definitely wasn’t built with weight limitations in mind. That’s a polite way of saying that it’s freakin’ heavy.
I got out my digital AC scale & weighed the PIE, battery & axles just to get an Idea of the heft of the components.
Weight of the current PIE is 46.46 lbs., not including battery or rolling axles.
Weight of pair of axles used is 3.640 lbs., these won’t be needed for road testing.
Weight of battery used is 27.005 lbs., a battery is needed for “plug in hybrid” status.

Page 19, A New Video, Adjustments, & To-Do List

May 6, 2020, Adjustments Made, To Do List Update, & 3-Speed Running Video

Work has kept me busy with little time to spend lunch hours working with the PIE, but I did take the time to do some timing adjustments. It seems strange to me that the setting is so different between the opposing spin plates & the synchronous spin plates.
I have continued with timing adjustments being made for maximum thrust without the PIE on any wheels or rollers. It is reasonably easy to see torque & thrust when sitting on a bench or table since it will attempt to push the small bench in the forward direction, even to the point of tipping it up on two legs when thrusting.
Perhaps the final settings will (once found & recorded) will help enhance other designs such as the opposing spin design originated to work in a zero gravity & zero atmosphere environment, time will tell.
I did note that different timing settings were more effective at different rpm’s. When running on Low vs. High, the timing seems to affect efficiency from retarded to advanced and the PIE becomes much more sensitive to those adjustments at the higher rpm than it is at the lowest speed.
I also took the time to measure motor rpm working on all three speeds, with the photo tachometer. I know that values would be a bit higher if the battery was connected to a charging system, but at least this is a solid base value at an average of 12.2 volts.
Speed- Value- Source Volts:
Low- 36 RPM- 12.35v
Med- 53 RPM- 12.22v
High- 66 RPM- 12.10v
With the amount of thrust (yet to have a true measurement) generated in this speed range, I can only imagine what might be possible at a modestly higher speed of 100 to 200 rpm.
Once this is a successful working prototype, I have started putting together some drawings (on paper) to put both planetary sets on a single rotating assembly, thus reducing the sprawling layout and eliminating the need for a timing belt between rotating plate assemblies. I had better update the “To Do” list.
The updated “To Do” list:
1- A better locking mechanism for the sun gears to the axles.
2- A way to vary the sun gear timing by adjusting axle position.
3- A different drive system from the motor to the plates, maybe a double-sided timing belt or a roller chain drive.
4- Explore the possibility of having sun & planet gears on both sides of the plates.
5- Mount in a motor vehicle for road testing.

As seen on the list, although small side notes could be added to some of the listed items, I am very close to real world testing on a test track & ultimately the highway. 

Here is a video clip of the 3 different speeds. No timing changes were made during this run & on the highest speed, there is a significant leftward pull which will slide the front edge of the PIE sideways.

Page 18, Little Red Wagon & Modifications Made

April 30, 2020

I decided to put the whole unit on a small (rather wobbly) little red wagon to see if it would pull it around or at least if it would make it easier to push it up an incline. The wagon is far too wobbly to be used effectively but it did push it around my shop floor.

I also see the absolute necessity of making the sun gear timing adjustment lock securely. As I was testing, one of them suddenly drifted right, to the point where it tried to tip the red wagon over.

It was time to tear it down and rebuild the gear adjustment locks…And so I did…

Here is where I ended up.


I have realized that the only “good” video I have put here is of the first functional demo unit. Here is a video of the it with all of the latest modifications (listed below). I did not have it on wheels in this video, it is very difficult to keep it on the bench if there is anything under it that it will roll on.
 
Modifications Made:
Switched wires on motor to obtain an effective 3rd speed (I will measure that speed & post it here soon).
The center axles were removed for rework. 
Washers were welded to the topside of the lower beam.
The axles were repositioned downward to allow for double nutting underneath the beam.
The sun gears were welded to the washers (top side and bottom side), then were mounted back onto the axles where the washers were welded to the nuts & the nuts welded to the axles.
When mounting the axles on the beam, the bottom nuts are only somewhat tight.
A locking (double) nut added to each axle to keep the bottom nuts from loosening.
A pair of doubled nuts ware added above the center stop contact area, a metal top bar placed on them, and the axles are locked by tightening a nut on top of the top bar keeping the sun gears timed properly.
Settings:
Timing (T-belt) set at 12 & 1 o’clock.
Planetary weight set to contact center stop with plant gear approx. 40 degrees before BDC (Bottom Dead Center).
Running at highest speed allowed by the motor on a 12V battery.
Results:
On bench, no wheels, pulling bench violently to one side & lifting 1 leg of bench off the floor. 
Very encouraging!!

Ready for another test…

Page 17, T-belt Timing for Maximum Thrust

April 29, 2020 (T-belt Timing)

Now that the T-belt is installed & working with two flexplates, the question of how to time the two flexplates is at hand.
Since there is negligible backward push, it is all about “maximizing” and “smoothing” the forward thrust.

Observations made are as follows:
1- The closer the two flexplates are timed together, the forward push increases but so does the “pulsation” effect of the drive.
2- With the timing set at 180 degrees, the pulsation is very low but so is the forward thrust. 90 degrees does work, but I am not very pleased with the forward thrust & it almost seems that the two halves are fighting one another.
3- Setting the timing to approximately 30 degrees apart (12 & 1 o’clock positions) is very promising.
4- Although testing is necessary to state this conclusively, bringing the clock positioning closer together increases the thrust power more than a simple ratio would explain. If it were a “simple” ratio, clocked or timed at 180 degrees should produce ½ of the thrust but this does not seem to be the case. Since we are dealing with moving weights, rotating assemblies, and linear thrust, it would be logical to assume a formula must be used to calculate the thrust ad different timing positions.
I will be locking the positions of the stationary gears to their axles very soon to ensure the positions do not drift while running. 
That will be the very next step toward a road test!